Assembling your Car
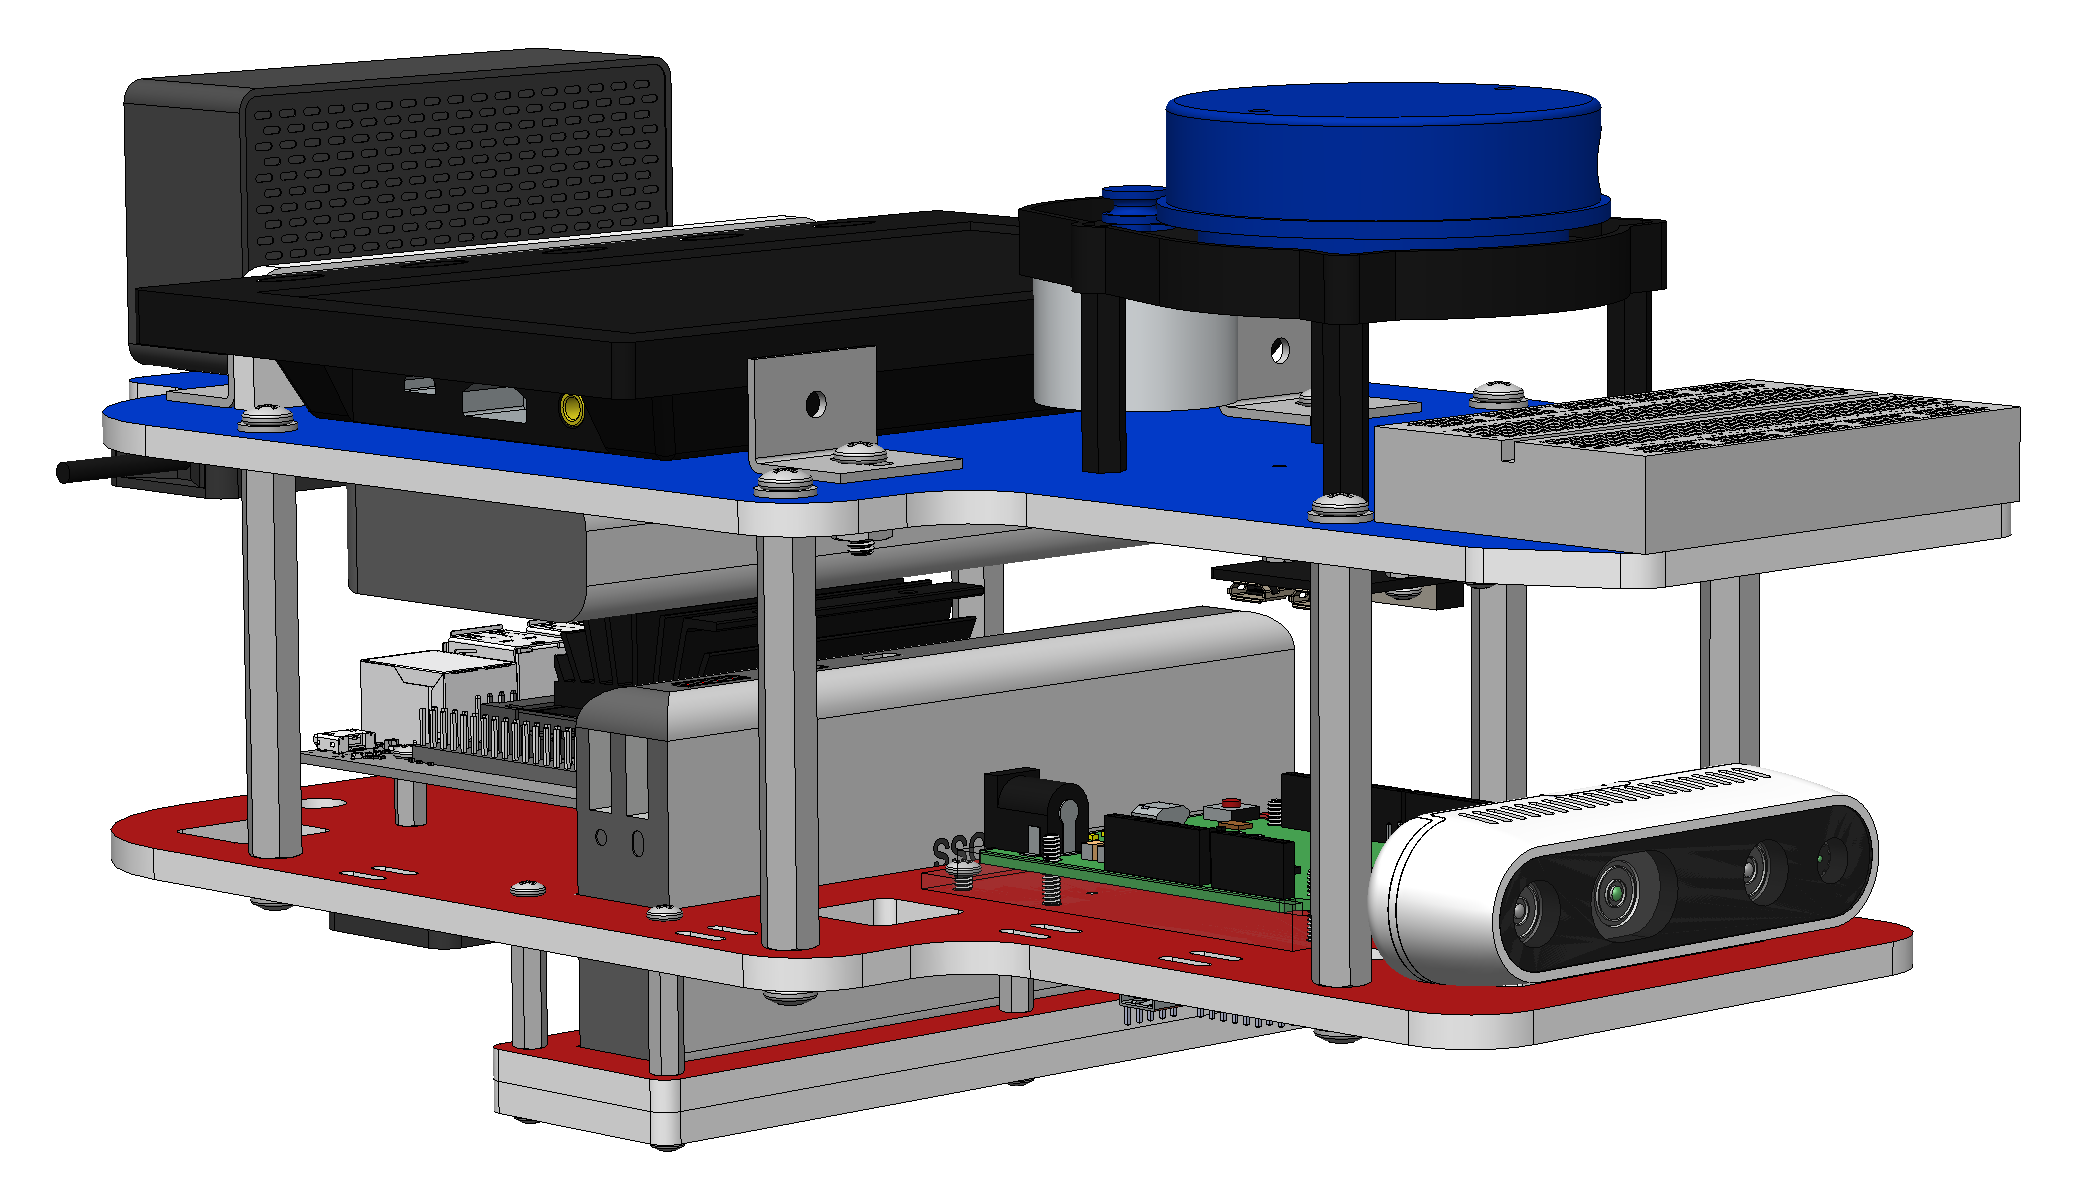
This build guide will walk you through the steps needed to assemble your RACECAR-MN.
Steps:
Before you Begin
Parts List
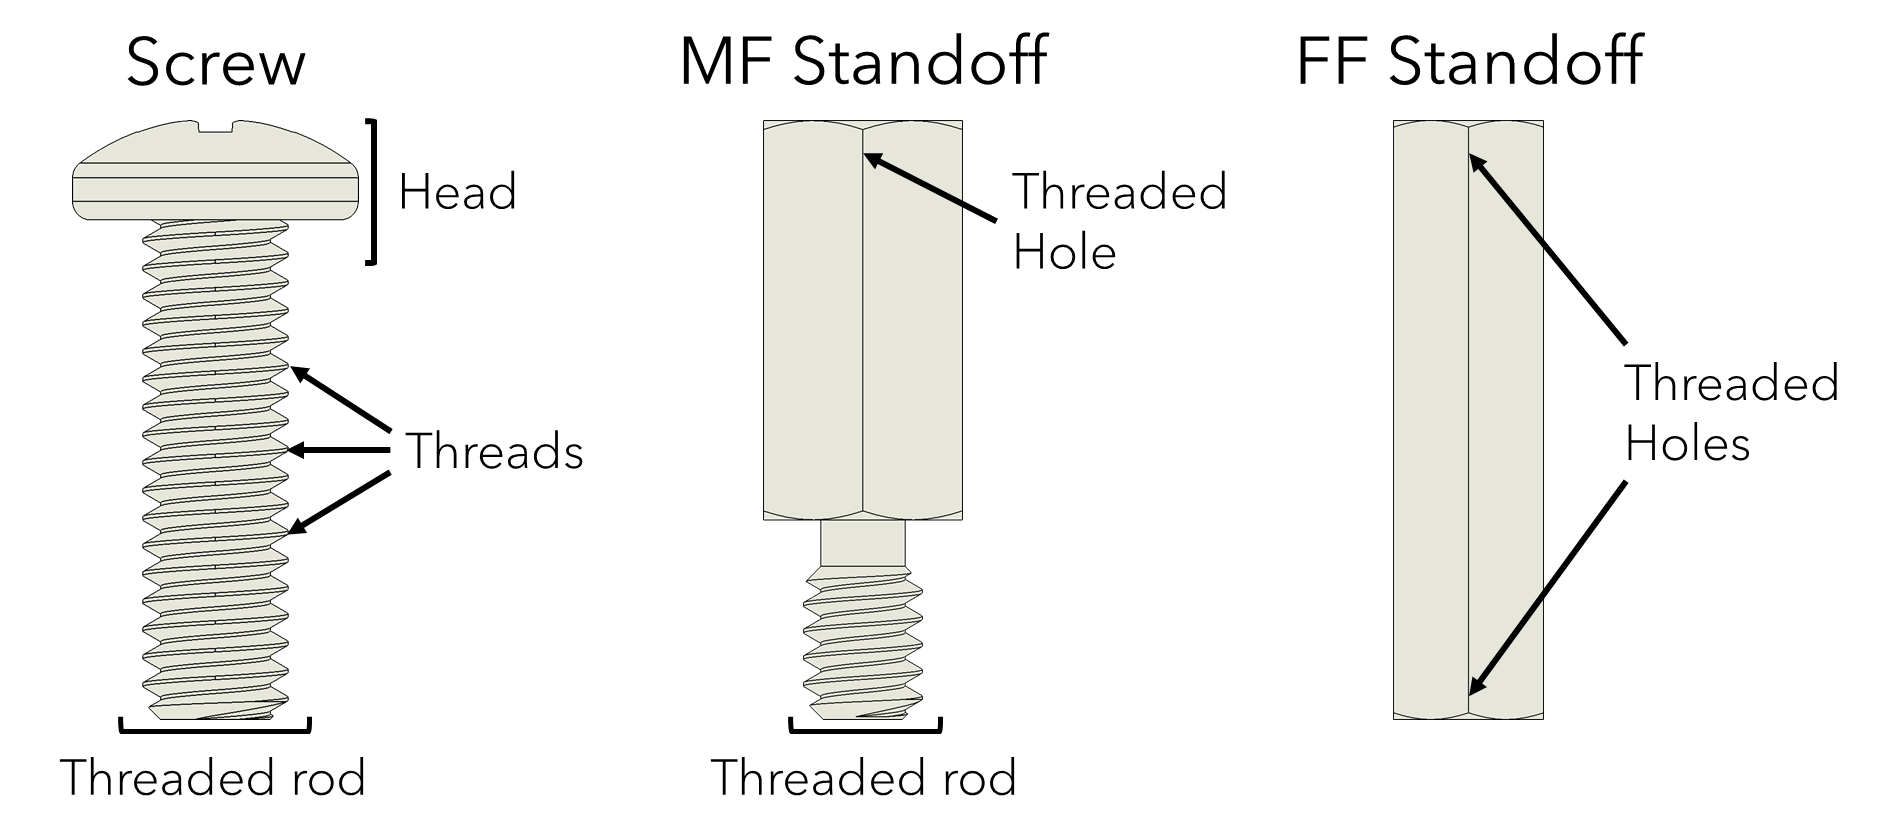
Throughout this assembly guide, part names are listed in bold, such as Jetson Nano or 4-40 1/4 screw (E), and tools are listed in italics, such as 3/16 hex screwdriver or wire cutters. To help identify these parts and tools you can refer to the Parts List page of this website. We recommend opening the parts list in a separate tab so that you can easily refer to it throughout the assembly.
Threading and Tapping
Most of the RACECAR-MN is held together with threads, which are spirals of metal which lock together to hold something in place. Specifically, a threaded rod (such as a screw) is turned into a threaded hole (such as a locknut) until the threads are tightly pressed against each other, holding the rod in place. Often times, a threaded rod will pass through multiple holes, but only the last hole should be threaded; every other hole in between should be larger than the threads of the rod such that the rod can pass through easily.
In some cases, the threaded hole will come pre-threaded (meaning the threads are already cut for us), such as in a locknut or a standoff. In other cases, the final hole unthreaded but smaller than the threads of the rod. Then, we can tap the hole by turning the rod into the hole, which automatically cuts the correct threads into the hole. In the RACECAR-MN, you will tap several screws and MF standoffs into the plastic frame.
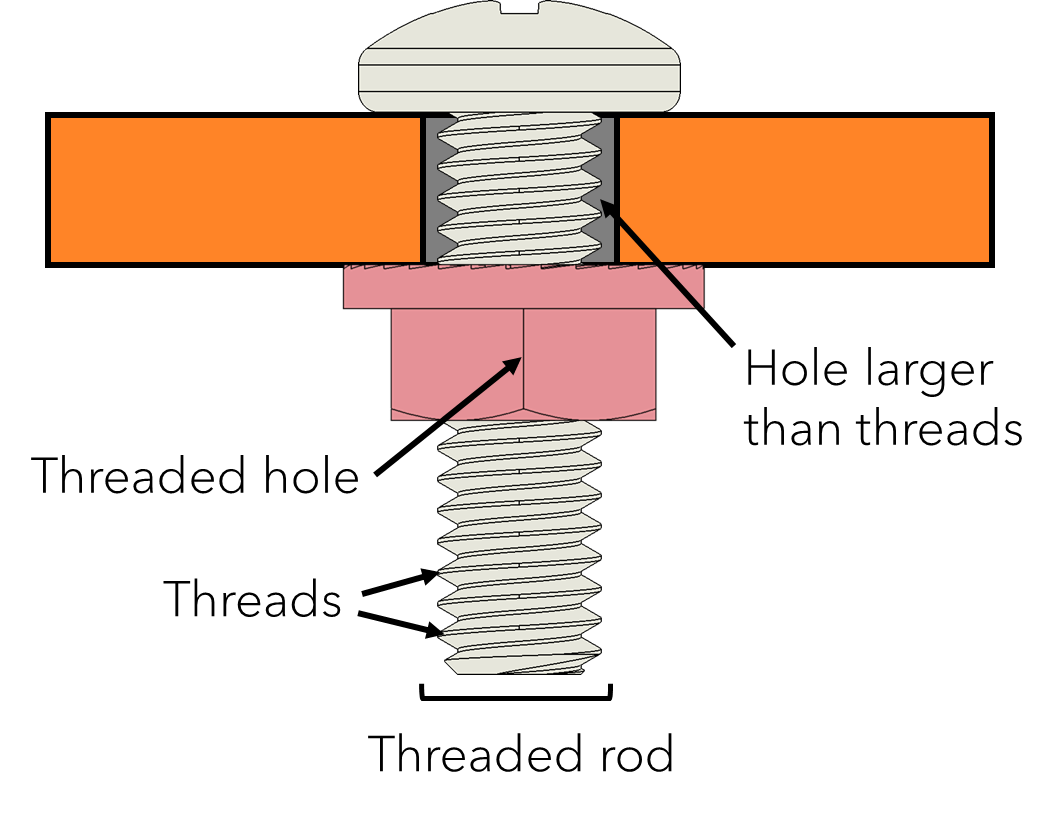
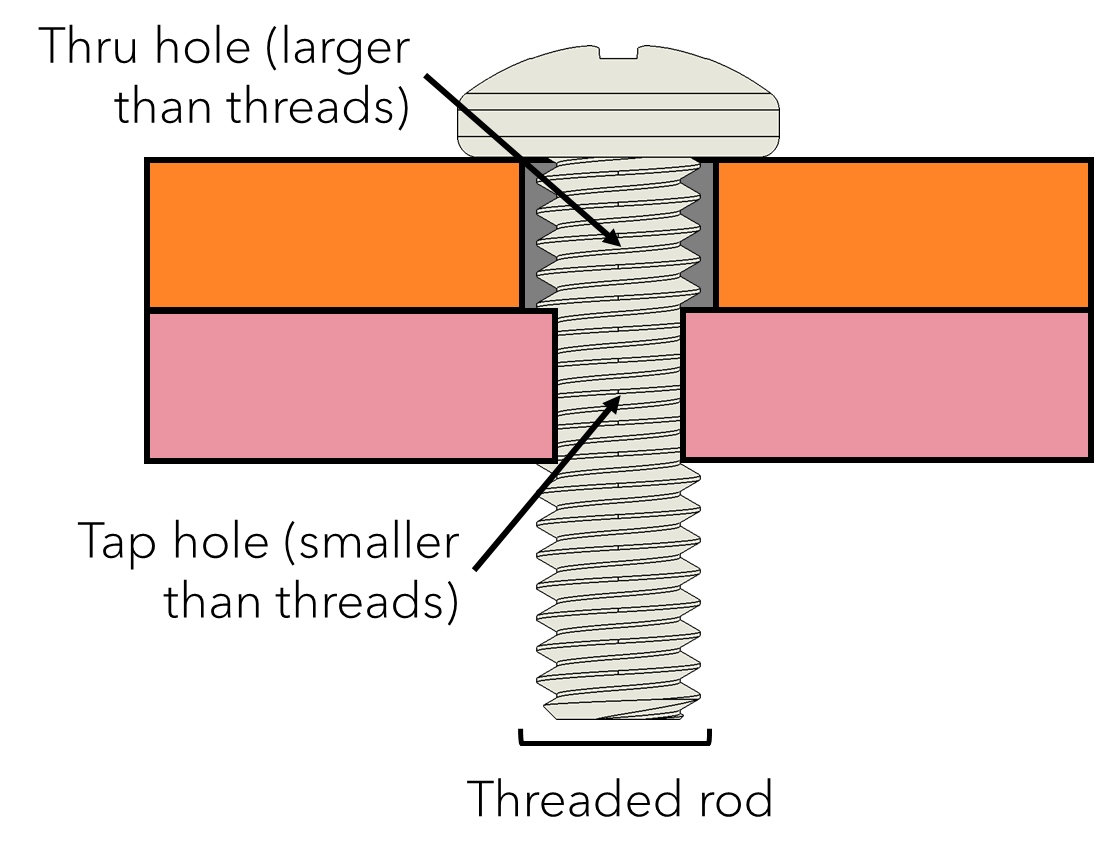
The left diagram shows a screw tightened into the pre-threaded hole of a locknut. The right diagram shows a screw tapped into a plastic plate.

Tightening Pattern
When two parts are held together with multiple screws, it is important to tighten the screws in multiple steps using a crisscross pattern. This consists of the following steps:
- Tighten each screw very loosely such that the parts can still move around freely.
- Select one screw and tighten it gently.
- Select the screw farthest from the screw chosen in step 2 and tighten it gently.
- Repeat step 3 for the remaining screws.
- Repeat the same tightening pattern used in steps 2-4 to tighten all of the screws again, this time tightening them to the desired tension.
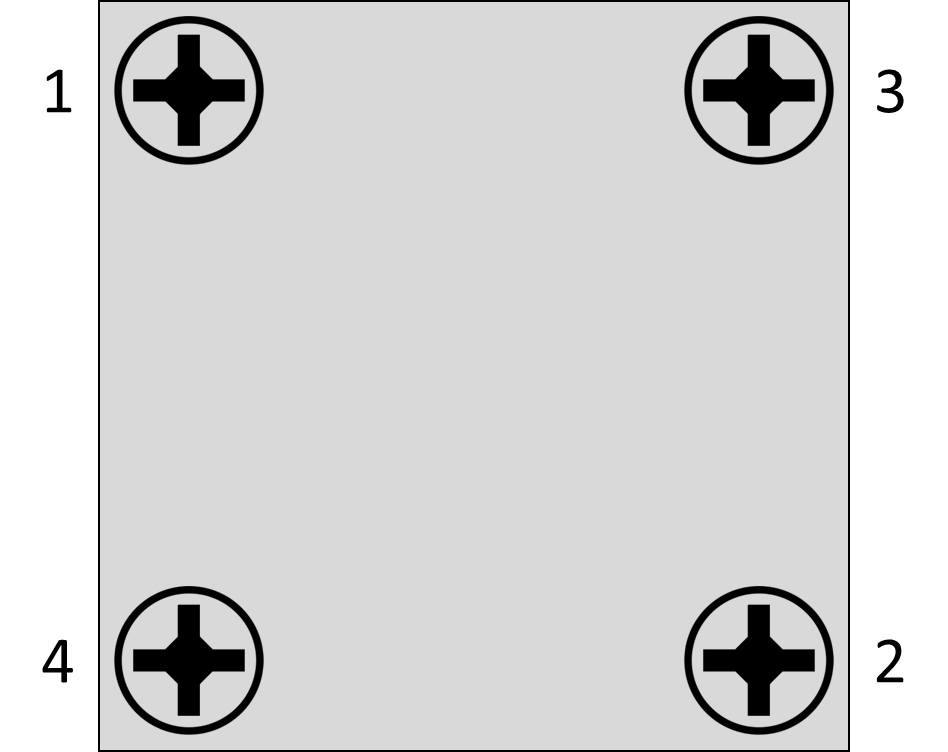
This diagram shows the order for tightening a pattern of four screws. Remember to repeat the pattern multiple times.
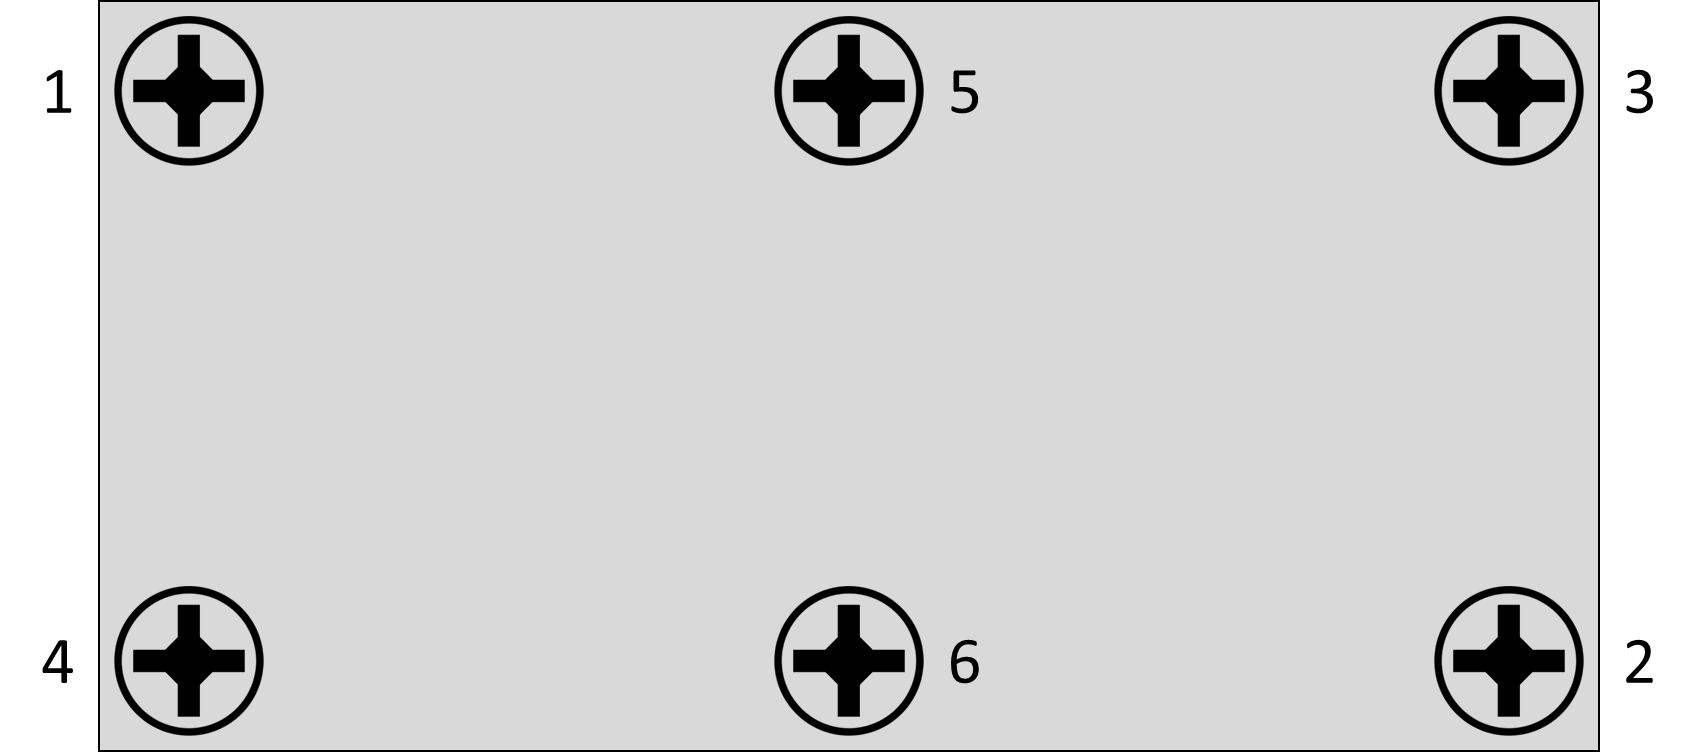
This diagram shows the order for tightening a pattern of six screws. Remember to repeat the pattern multiple times.
Tightness
If we leave a screw or MF standoff too lose, it can wiggle loose and fall off. If we over-tighten a screw or MF standoff, we can damage the part, strip the screw, or strip the threads. Especially when we are tapping into plastic, it is very easy to strip off the threads created in the plastic, which prevents the rod from staying in the hole.
Throughout this assembly guide, we specify six levels of screw tightness:
- Partial: Do not tighten the screw all of the way and intentionally leave extra room so the part is free to move.
- Very gentle: Slowly tightening the screw or MF standoff and stop as soon it touches the part.
- Gentle: Slowly tighten the screw until it touches the part, then apply a small amount of pressure to tighten it further.
- Moderate: Slowly tighten the screw until it touches the part, then apply a moderate amount of pressure to tighten it further.
- Tight: Tighten the screw with a large amount of pressure.
- Very tight: Tighten the screw as much as you can without hurting yourself.
To help avoid stripping a screw, always use the largest screwdriver which fully fits in the head of the screw.
Safety Precautions
In order to protect the parts of RACECAR-MN during assembly, please take the following two precautions:
- Protective film: The camera and the monitor come with a layer of protective film covering the lense and screen respectively. Please leave the protective film on these devices until the car is fully assembled to help protect against any scratches that can occur during assembly.
- Static shock: Have you ever touched a door knob and felt a small shock? All of printed circuits (namely the Jetson Nano, the Arduino, the PWM, and the LIDAR PCB) can be damaged if they receive one of these electric shocks. Thus, before handling any of these pieces, please touch a large piece of metal (such as a metal door handle) to discharge any static electricity in your body.